🪮 How to Cut a Buzz Cut Fade at Home:
Step-by-Step Guide
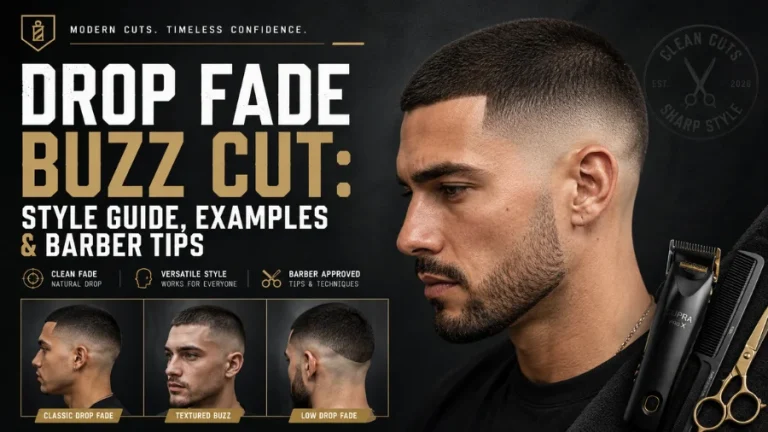
A buzz cut fade is one of the cleanest haircuts for men. It is short, sharp, and easy to maintain. In 2026, this haircut is still one of the most modern styles because it looks fresh without needing much styling.
This guide will show you how to do it in a clear and easy way. You will learn how to choose your buzz cut length, how to fade the sides, how to blend the lines, and how to clean the edges like a barber.
💇♂️ What Is a Buzz Cut Fade?
A buzz cut fade is a short haircut where the top is cut evenly with clippers, and the sides slowly fade from short to shorter. The fade can be low, mid, high, taper, or drop. The top can be very short or slightly longer, depending on your style. A number 2 buzz cut fade is short and sharp. A number 3 buzz cut fade gives a fuller look. Both are popular choices. The fade makes the haircut look cleaner than a plain buzz cut. It adds shape to your head and gives a modern finish.
✂️ Why the Buzz Cut Fade Is Popular in 2026
The buzz cut fade is popular because it is simple, stylish, and low-maintenance. It works for many face shapes and hair types. It also looks good with casual outfits, gym wear, street style, and formal clothing. Many men now prefer clean haircut styles that do not need gel, wax, or daily styling. This is why buzz cut fade styles are still trending in 2026. A buzz cut also makes the face look stronger and more defined. When paired with a fade, it gives a sharp barber-style look.
🪒 Tools You Need to Cut a Buzz Cut Fade at Home
Before you start, prepare your tools. Do not begin the haircut without everything ready.
You will need:
✂ Clippers with guards
✂ A small trimmer
✂ A hand mirror
✂ A wall mirror
✂ Comb
✂ Hair brush
✂ Cape or towel
✂ Good lighting
✂ Spray bottle
✂ Clipper oil
✂ Cleaning brush
A good clipper makes the fade easier. If your clipper is weak or dull, it may pull the hair and leave patchy areas.

✂ Best Guard Lengths for a Buzz Cut Fade
The guard length depends on how short you want the top.
✄┈┈A number 1 guard is very short.
✄┈┈A number 2 guard is short but not too extreme.
✄┈┈A number 3 guard gives a clean but fuller look.
✄┈┈A number 4 guard gives more coverage.
For most beginners, a number 2 buzz cut fade or number 3 buzz cut fade is the best choice. These lengths are easier to control and look good on most people.
Best Beginner Choice
If this is your first time, start with a number 3 on top. You can always go shorter later. Once hair is cut too short, you cannot bring it back right away.
Low, Mid, or High Fade: Which One Should You Choose?
Before learning how to cut a buzz cut fade, choose the fade style you want. A low fade starts near the ear. It is clean and subtle. A mid fade buzz cut starts around the middle of the sides. It gives a balanced look. A high fade buzz cut starts higher on the head. It looks bold and sharp. For beginners, a low or mid fade is easier. A high fade needs more control because the blend is more visible.
Best Fades for Buzz Cuts
The best fades for buzz cuts are low fade, mid fade, high fade, taper fade, and drop fade. Each one gives a different shape. A mid fade buzz cut is the safest choice for most men. It is not too soft and not too bold.
8-Step At-Home Buzz Cut Fade Guide for a Clean, Sharp Finish
A buzz cut fade at home is a simple grooming method that helps you achieve a clean, gradual blend from short sides to slightly longer top without visiting a barber. With the right clipper control and careful blending, you can create a sharp, even fade that looks neat, modern, and well-maintained. Follow these steps in order for a smooth and balanced result.
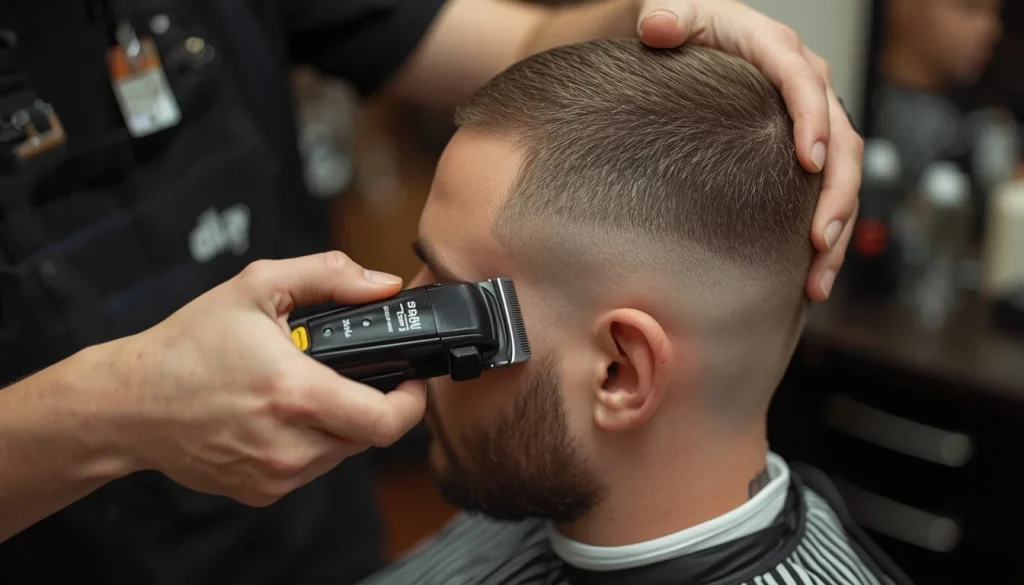
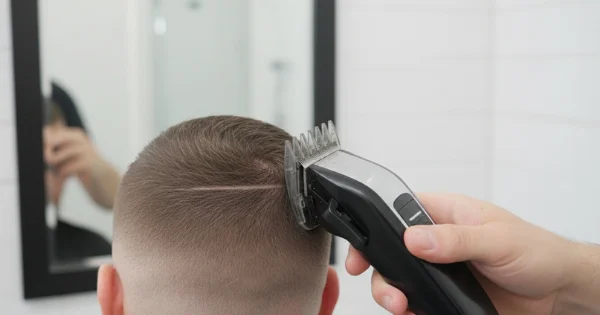
🧑🏻 Step 1: Even Out the Entire Head (Number 2 Guard)
Start with a number 2 guard and keep the lever closed.
✅ Make multiple passes to catch hair growing in different directions.
✅ Run the clipper through your entire head.
✅ Go front to back, side to side, and back to front.
Your goal here is simple: get one consistent length all over your head.
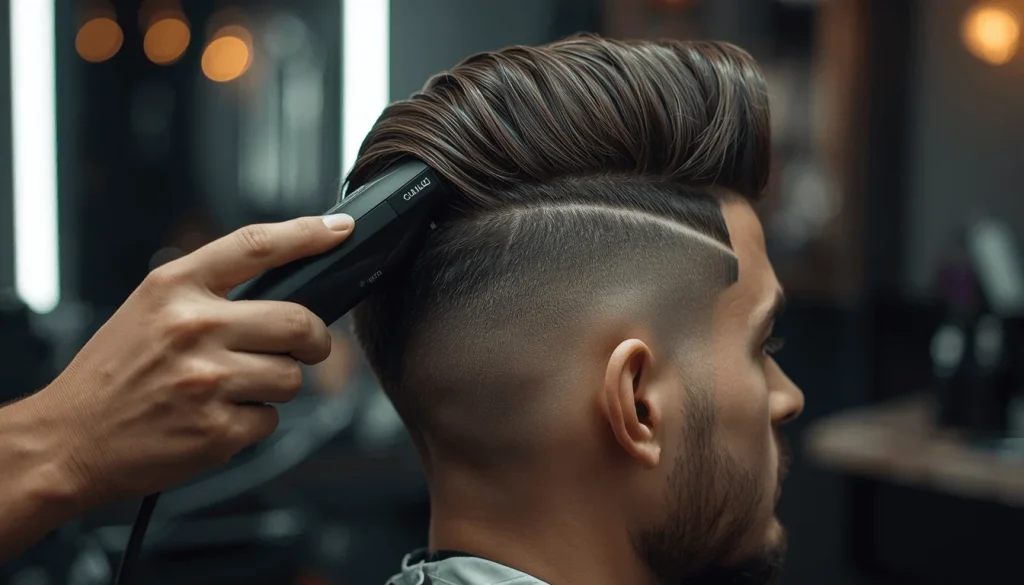
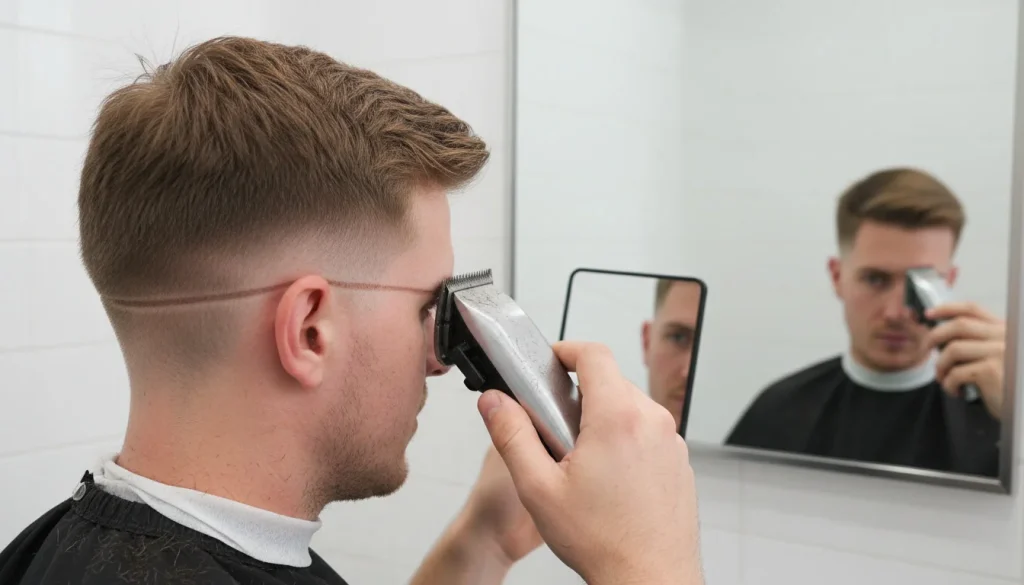
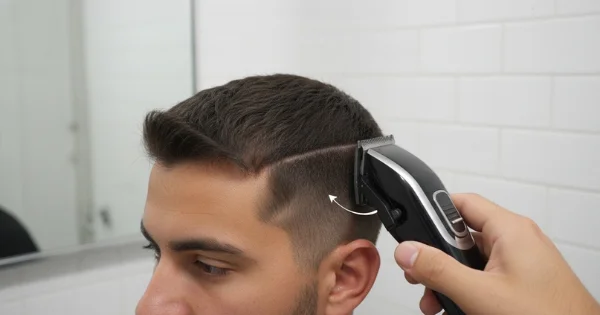
🧑🏻 Step 2: Create the First Guideline (Trimmer)
Use your trimmer to set your first guideline.
✅ Start around the temple area (near eyebrow level).
✅ Move around the head with a slight downward angle toward the back.
✅ Follow the natural curve of your head.
This line will be the base of your fade.
🧑🏻 Step 3: Open Lever, No Guard (Second Guideline)
Now switch to clippers with no guard, lever open.
✅ Go up about 0.5 to 1 inch above the first line.
✅Keep the guideline slightly wider for easier blending later.
Wider spacing makes fading much smoother.
🧑🏻 Step 4: Number 1 Guard (Lever Open)
Attach the number 1 guard (lever open).
✅ Create another guideline above the previous one.
✅Keep the width consistent with the section below.
Consistency is key. Each guideline should be evenly spaced.
🧑🏻 Step 5: Blend the Top Section (1.5 Guard)
Use the 1.5 guard and adjust the lever as needed.
✅ Blend the top (number 2 length)
into the sides.
✅Use smooth upward strokes.
This step connects the top to the fade.

🧑🏻 Step 6: Remove the First Hard Line (3-Step Method)
This is the most important part. Take it slow.
✅ No Guard – Lever Halfway
🔹Go halfway into the guideline.
🔹Use a flick-out motion to soften
the line.
✅No Guard – Lever Closed
🔹Focus on the bottom of the line.
🔹 Flick lightly to remove most of the
. line.
✅ Trimmer
🔹Clean up the last bit at the bottom.
🔹Light flicks only.
This combination removes about 95–100% of the line.
🧑🏻 Step 7: Clean Remaining Lines (Half Guard)
Use the 0.5 (half) guard.
✅ Start with lever closed, adjust as
needed.
✅ Work through any remaining faint lines.
✅ Use corners of the clipper for precision.
🧑🏻 Step 8: Detail Work
Now refine the fade.
✅ Use different guards (1, 0.5, 1.5) as
needed.
✅ Focus on any uneven spots or
shadows.
✅ Keep movements light and
controlled.
This is where the haircut starts to look professional.
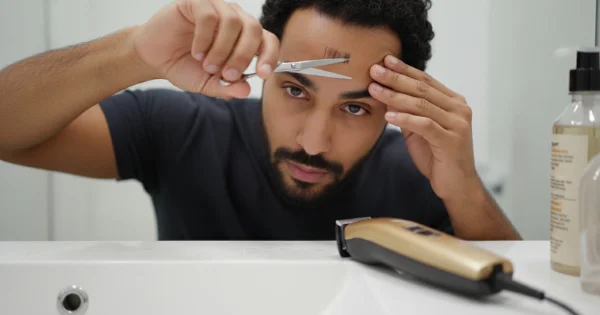
🧑🏻 Step 9: Line Up the Forehead
Use scissors first, then trimmers.
✅ Follow your natural hairline (don’t push it back).
✅ Start from the center of your forehead.
✅ Work outward to both sides
🧑🏻 Step 10: Final Touch on Top
Go back with the number 2 guard (lever closed).
✅ Lightly pass over the top again.
✅ Remove any dark patches or uneven areas.
🧑🏻 Step 11: Final Check
Look at your haircut from all angles.
✅ Check symmetry.
✅ Fix any remaining lines.
✅ Make sure the fade is smooth and
balanced.
🧑🏻 How to Flick the Clipper
Move the clipper up the side of the head. As you reach the fade line, move your wrist outward. This soft motion helps blend the hair instead of making another hard line.
Simple Rule for Blending
Short hair stays at the bottom. Longer hair stays at the top. The middle must slowly connect both lengths.
Step 5: Remove the Harsh Lines
After blending, you may still see lines. This is normal. Use the clipper lever if your clipper has one. Open the lever to leave more hair. Close it to cut shorter. Work slowly on the lines. Use small upward motions. Do not cut too much in one area. If a line is strong, use the corner of the clipper blade. This gives more control.
The goal is not to erase everything in one pass. The goal is to soften the line little by little.
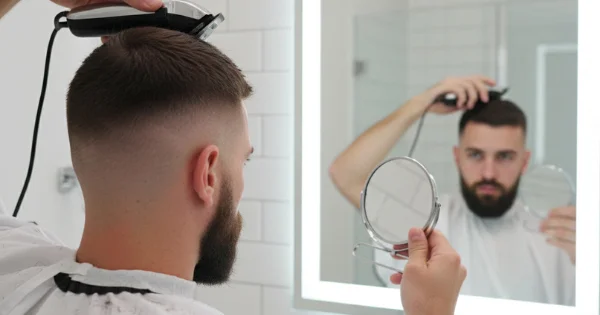
Step 6: Fade the Back Carefully
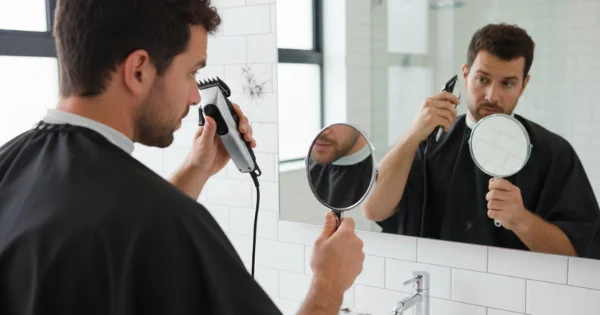
The back is harder because you cannot see it clearly. Use a hand mirror with your wall mirror.
Move slowly. Keep checking your work.
Follow the same steps:
🔆 Cut the bottom short.
🔆 Blend the middle.
🔆 Connect it to the top.
Do not lift the fade too high at the back unless you want a high fade buzz cut. For most home cuts, a low or mid fade is safer.
Step 7: Clean the Neckline and Sideburns
Use a trimmer to clean the edges.
Shape the sideburns evenly. Clean around the ears. Trim the neckline at the back.
Keep the neckline natural or slightly rounded. Avoid cutting it too high.
Clean edges make the haircut look more professional.
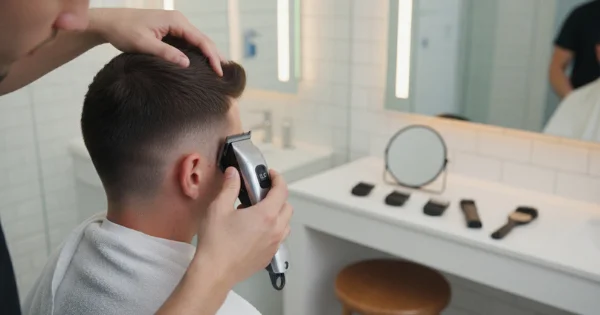
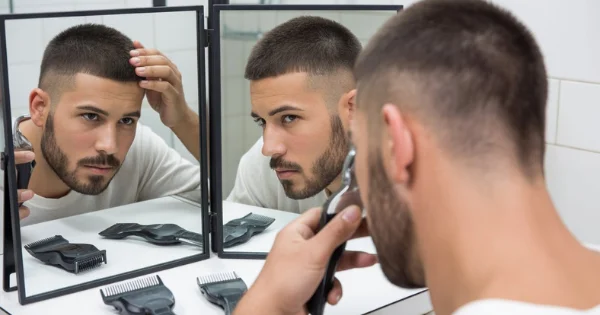
Step 8: Check for Uneven Spots
After the main cut is done, brush the hair and check all sides.
Look at the top, sides, back, and around the ears.
Use your mirror to check the shape from different angles.
If you see dark patches, lightly blend them. If you see long hairs, trim them carefully.
Do not keep cutting too much. Small fixes are better than big changes.
Common Mistakes to Avoid
Many beginners make the same mistakes when learning how to cut a buzz cut fade.
- ❇ Do not start with the shortest guard on the whole head.
- ❇ Do not take the fade line too high.
- ❇ Do not rush the back of the head.
- ❇ Do not press the clipper too hard.
- ❇ Do not keep fixing one spot again and again.
- ❇ Do not cut wet hair with clippers.
- ❇ Do not forget to clean the neckline.
The biggest mistake is rushing. A good fade needs time and control.
Conclusion
Learning how to cut a buzz cut fade at home is possible if you use the right tools and follow the right steps. Start with clean, dry hair. Choose a safe guard length, such as number 2 or number 3. Cut the top first, then slowly fade the sides. For beginners, a low fade, taper fade buzz cut, or mid fade buzz cut is the best choice. These styles are easier to control and still look clean. Once you get better, you can try a high fade buzz cut or drop fade buzz cut for a sharper look. Take your time, check your work from all angles, and do not rush the blend. A clean buzz cut fade should look smooth, simple, and fresh. With practice, you can get a modern 2026 barber-style haircut at home.

Daniel Vance
Daniel Vance is a grooming writer who focuses on men’s buzz cut styles, modern fades, and low-maintenance haircuts. At buzz-cut.net, he publishes detailed guides and hairstyle breakdowns to help readers understand different buzz cut variations.
His articles explain how to choose the right buzz cut based on face shape, hair type, and personal style. Daniel also shares simple maintenance tips and step-by-step haircut tutorials. His goal is to make men’s grooming practical, easy to follow, and accessible for anyone who prefers a clean and sharp look.